Data Validation
In previous sections we've discussed saving metadata to your booked appointments using your settings.json configuration file. We also breifly discussed deciding on how you can structure your metadata any way you like. Next, we need to validate that the data you think you're saving is actually being saved to your appointment.
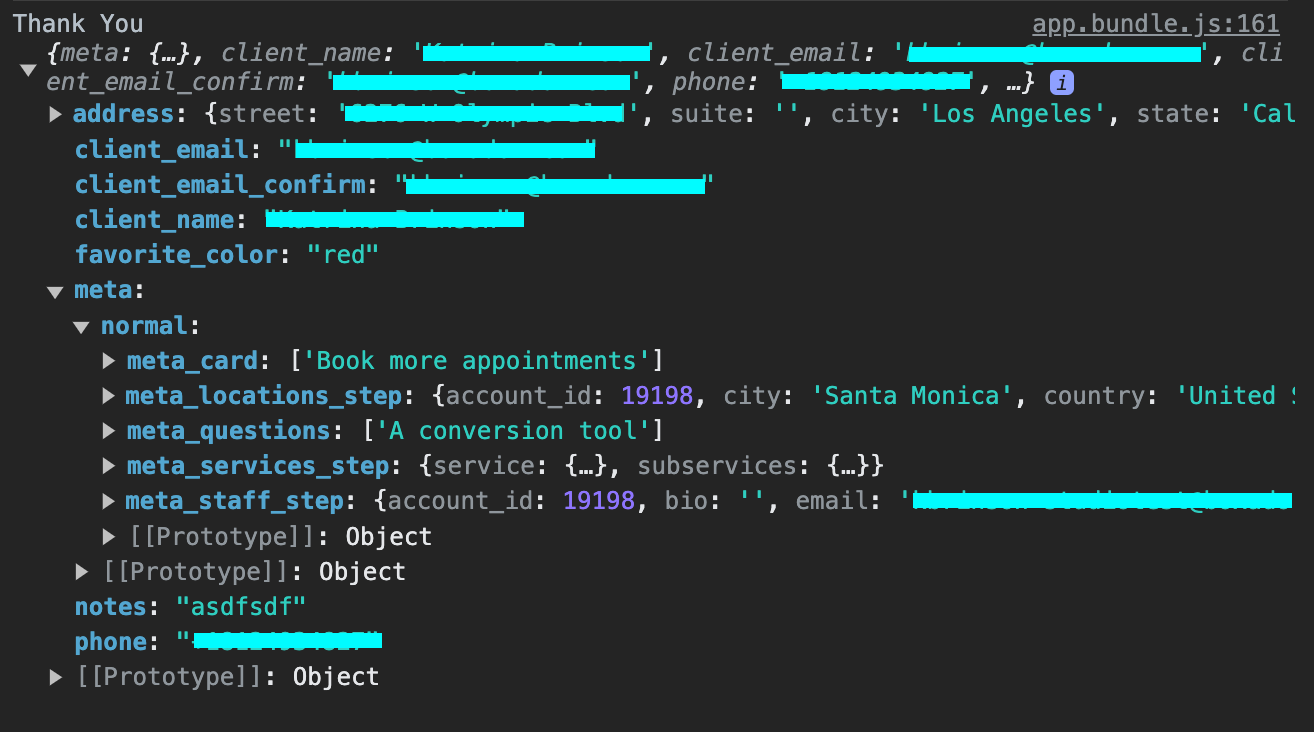
Booking a test appointment will allow you to validate the data saved from the meta object. The easiest way to immediately see what your data looks like is to console.log() it when the appointment is saved using the callback property available on the booking appointment model.
First, we'll add a custom callback function called processAppointment and attach it to the browser's window object, which will make it available for Studio to call when the appointment is submitted. Studio is automatically sending the appointment data to the function, so we simply need to console.log() that data, as shown below, to see it.
<body>
  <div id="widget-1"></div>
  <script>
    window.processAppointment = (appointment) => {
      console.log("appointment", appointment);
    };
  </script>
  ...
</body>
Next, we'll add the custom callback function's name to the appointment booking step like so:
{
  "submit_form_step": {
    "title": "Submit your appointment",
    "type": "booking",
    "model": "appointment",
    "callback": "processAppointment",
    "summary": "appointment-details"
  }
}
Lastly, ensure you have your browser's developer tools open to the console before submitting a test appointment. Once you've submitted a test appointment, you should be able to see all of the data and metadata saved in the meta object as shown below.